https://www.conciliacionconstrupaz.com/blogs/seeababes.atom Seea - Seeababes 2024-10-09T17:46:37-07:00 Seea https://www.conciliacionconstrupaz.com/blogs/seeababes/diy-wooden-roll-up-changing-mat 2023-12-18T08:30:03-08:00 2023-12-20T11:03:22-08:00 DIY Wooden Roll Up Changing Mat conciliacionconstrupaz More

]]>
Trying to decide what to get your loved one or bestie for the holidays, but you're on a budget? conciliacionconstrupaz team is on the same page! The team got together and learned how to make a DIY Changing Mat, and we are going to share all our tips and tricks with you! Follow along with this step-by-step guide and make your loved ones something that comes from the heart. 

 
Time Required: 2 hours (possibly less if you get help from a friend!)
 
What You Will Need:

  • Scrap Lumber (See Step 1 for details)
  • Approximately 20’ of ¼” Diameter Rope
  • Drill & Drill bit set (1/8" and 1/4")
  • Saw (Chop Saws work great, but any saw will do)
  • Cordless sander (or a sheet of sandpaper if you want to a better workout)
  • Tape Measure & Sharpie
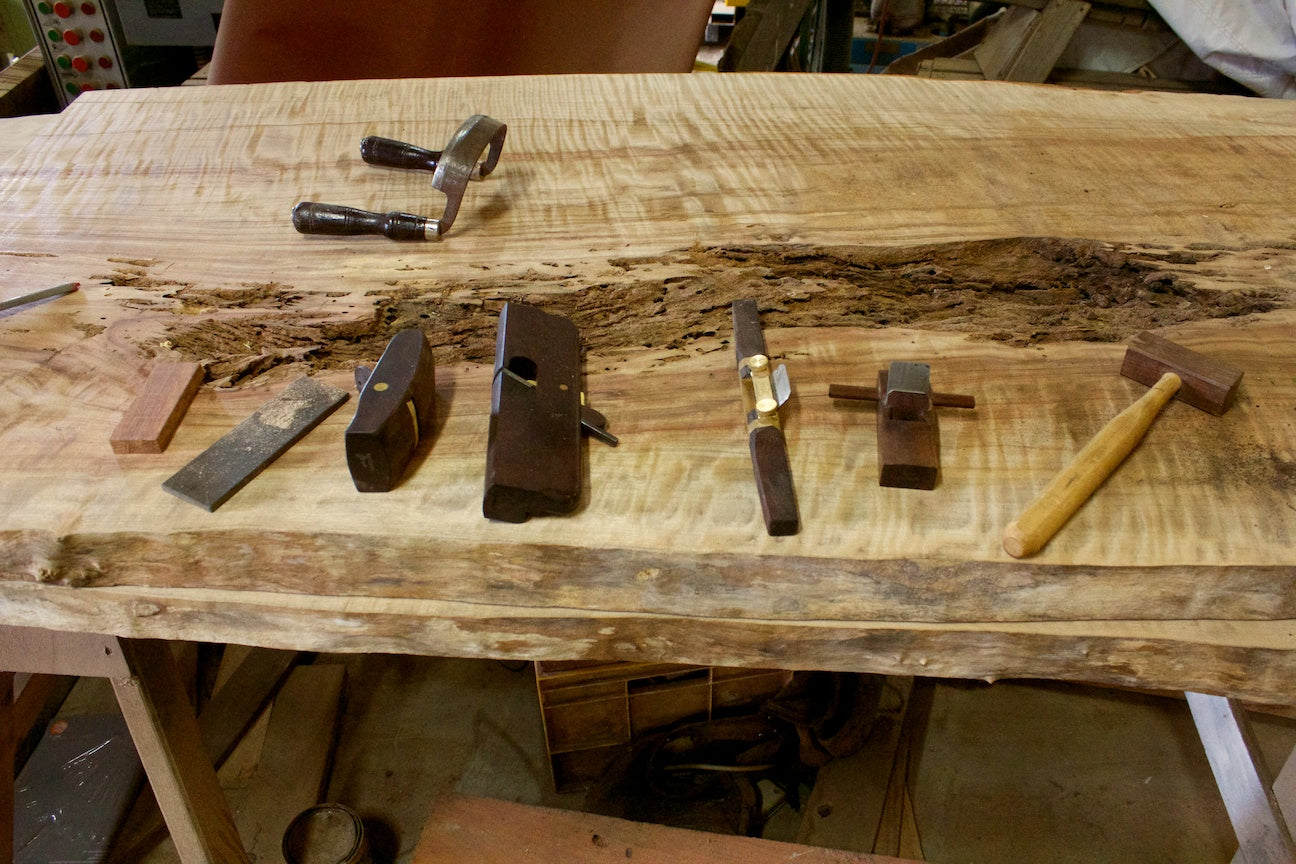
 What you will need.


Let's Get to Work 


1. First, select the wood you’d like to use for this project. If you’re going to use your mat outdoors or down at the beach, pick a wood naturally resistant to moisture and decay like redwood or cedar. Both of these options look and smell great, too! If looking to utilize scrap wood, you can use whatever you’ve got, but you’ll need smaller dimension lumber to keep the mat light and easy to roll up. The mat we made is approximately a 30” x 30” square, and uses 1”x2” redwood furring strips upcycled from a summer gardening project. Regardless of wood type, you can vary the overall width and length to suit your own preferences.

DIY Changing Matt Surfing

Choose your wood and mark the desired length.


2. Once you’ve chosen your dimensions, mark the wood and start cutting. A small mat might use a couple dozen identical length strips, so a stationary chop saw is the best tool for the job, as it’s quick and easy, and keeps your hands away from the blade. A circular or skill saw could also be used in a pinch – they just require a touch more attention and skill to keep the cuts safe and straight.

DIY Changing Matt Surfing

Cut the wood.


3. Once all your cuts are finished, lay the pieces out side by side, leaving a ¼” between each piece. If you’re happy with the basic layout, then grab your sharpie and start marking where the holes for the rope will go. To keep the locations consistent, lay all the pieces on their side and line them up using a straight edge or a wall as a reference. For our project we used three pieces of rope to hold the slats together. One running straight down the center line, and one about three inches from each end, so that the wood doesn’t split when you drill the holes.

DIY Changing Matt Surfing

Mark your holes. 


4. Ok, let’s get to drilling! Grab your drill (or two drills if you’re lucky!) and start by making small pilot holes on all your marks using a 1/8” drill bit. When drilling with small, thin drill bits, it’s very easy to break them off inside, so just go slow, let the drill do the work, and do your best to guide the bit straight through the wood. Give yourself some grace here and have fun with it, as drilling a “straight” hole is a tricky thing to master. Once you’re finished with the pilot holes, swap in the ¼” drill bit, and enlarge each hole, being sure to run the bit through the hole a few times to clear out all the debris.
DIY Changing Matt Surfing

Drill your holes.


5. Now that the sawing and drilling is finished, you’re ready to start sanding! Use an electric or cordless sander and knock down the edges on the end cuts, and smooth out the top and bottom surfaces to your liking (bare feet don’t like splinters!). If you don’t have a sander – no worries – a sheet of sandpaper will work just fine. Just wrap the paper around one or your off-cuts, abrasive side out, and poof! You’ve got one of carpentry’s oldest tools – a sanding block!

DIY Changing Matt Surfing

Sand the wood.


6. At this point, you should have everything cut, drilled, sanded, and laid out in front of you. Grab your rope and make sure you have enough for three identical lengths, with each length being roughly twice as long as the dimensions of the mat. For example, a 3’ wide mat would require each length to be 6’ long, so with three identical lengths, you’d need a total of 18’ of rope.
 
7. Make a double knot a few inches in from the end of each rope, and start passing the rope through the holes of the first board. If the rope is too big to fit through the hole, then enlarge the hole (if possible), or you’re using nylon rope, try melting the end slightly so that it will pass through the holes easier. Once you get all three ropes through the first board, make another series of single knots (the knots serve as the spacers between each piece of wood) and continue down the line, assembling the mat piece by piece. Check each row of knots before you add the next board, and before long, you’ll be done!

String the pieces together with knots in between.


8. When you reach the end, there should be some extra length of rope left over, so if you want to get extra fancy, you can make a loop at the end of that rope, so that when you roll up the mat, you can pull the loose rope end back through the loop to keep it safe and secure.

The finished changing mat!


That’s it! Hope you have as much fun as we did with this project. Be on the lookout for more DIY surf projects, coming soon!

changing mat DIY Surf

Your changing mat is ready to go! 


MORE DIYS

]]>
https://www.conciliacionconstrupaz.com/blogs/seeababes/diy-how-to-shape-a-wooden-paipo 2016-10-24T13:44:00-07:00 2023-12-20T11:01:48-08:00 DIY: How to Shape a Wooden Paipo Rhea Cortado Seeababe Chrystal Dawn Fitzgerald leads this DIY on how to shape a Paipo, a small wooden surfboard designed for riding waves whilst lying on your belly! 

More

]]>
By Chrystal Dawn Fitzgerald 
Growing up in Hawai'i the birthplace of modern day surfing, and watching my husband shape boards I have always wanted to shape my own craft. When the opportunity to hand make a Paipo, with master craftsman Andy Ceglinski at his Wooden Anchor workshop in Byron Bay came up, I said YES and jumped right in.


PAIPO, BRIEF HISTORY

For those of you new to the term, a Paipo is a small surfboard designed for riding waves whilst lying on your belly. These unique wave riding crafts are also known as belly boards and many experts believe they originated in Hawai'i'.  Although they can be shaped from foam and fiberglass, traditionally Paipos are shaped from timber.  "A Paipo is a board every surfer should have in their quiver," says master craftsman and surfer Jon Wegener, who is in part responsible for the revival of this and other ancient Hawaiian surfing crafts.


THE MASTER

Andy Clingsky is a talented fourth generation woodworker and has a passion for sustainability. He and his wife Holly founded Wooden Anchor and have established a beautiful family business in the Byron Bay hinterland. They operate an environmentally conscious sawmill using sustainable Australian timber to create handmade furniture, a range of collectibles as well as surfing crafts for which they now offer workshops. Andy is a patient and thorough teacher, and his stoke for all things handcrafted is contagious.


THE PROCESS

Like anything, the whole is greater than the sum of all of its parts. That said I will do my best to break down the process by which I made a Paipo with Wooden Anchor. My board is made from sustainable Australian grown Paulownia.


STEP 1. THE OUTLINE OR OVER OUTER SHAPE OF THE BOARD

Each board has and outline for which a template can be used, you can also do this by eye-balling your timber and taking some self-measurements to decide what size best suits your goals and height/weight ratio. Andy uses a template he has made from one of his original hand shaped Paipos.


STEP 2. SHAPE YOUR BOARD

Once your outline has been drawn it is time to start cutting back the wood to fit the outline. If you are using a flat piece of wood this can be much easier than a big log, however the process is the same. As the artist, Michelangelo said of stone, "Every block of stone has a statue inside it and it is the task of the sculptor to discover it." The same applies to wood...


Andy showed me how to use these incredible hand tools which slowed down the process to a delightful human pace. A most enjoyable experience indeed. Power tools can be used, which expedite the process, though I do feel something valuable would be missed in doing so. As a woman, it felt great to hold and handle these handmade planers, and the satisfaction of creating the shape of the concaves and rails with them was unexpected. 


*Planers are made locally by Colen Clenton

STEP 3. DECORATING :)

When shaping my Paipo at the Wooden Anchor workshop, two Python snakes came for a visit. Entangled in a hypnotic dance, they made their way from the rafters to the floor and back moving with determination and strength. Their energy inspired my wood burning. The art of wood burning is something to be admired, I found it to be challenging, and opted for a simple design...


STEP 4: WAX UP AND SURF!

Unsurpassed joy filled my heart as I waxed up my handmade craft, preparing it for the maiden voyage. Paipos don't really need much wax in my experience, yet a little organic Beesknees surf wax never hurts and for riding bigger waves on your Paipo, waxing up is recommended.

STEP 5. SHARE THE STOKE!

Get out and share the good vibes and stoke of riding your very own handcrafted sustainable surf craft! The more people see and surf these fun machines, the sooner the lineups will be smiling.


Gather with friends, plant a tree, wait for it to grow, harvest it and then start crafting, or buy some sustainable Paulownia wood from your local woodsniffer (self given name for woodworkers).


If you are like me and want to do everything, yet knowing where to start and how to keep on task is challenging then I recommend you book into one of Wooden Anchors "How to make a Paipo' workshops. Materials and tools will cost near the price of a workshop and DIY on your own may take much longer. 


Since I enjoyed making my Paipo so much I am now keen to get more experience and help others handcraft their own boards! My friend Alice Forrest and myself will be assisting Andy in his upcoming Wooden Anchor "Paipo" workshop on Oct. 29.  Click here to find out more.


Big Mahalo Nui Loa to Andy, Holly and the Wooden Anchor crew for having me at the mill as well as sharing your knowledge with me. I am stoked and very grateful for this new journey with shaping and riding my own wooden crafts!

Photos by Chrystal Dawn and Joel Fitzgerald. Location Byron Bay Australia. Workshop Wooden Anchor. Tools H.N.T Gordon & Co. Wax Beesknees Surf

MORE DIYS

]]>
https://www.conciliacionconstrupaz.com/blogs/seeababes/15973257-diy-how-to-repaint-a-surfboard-with-ashley-johnston 2014-12-02T07:45:00-08:00 2023-12-20T10:57:33-08:00 DIY: How to Repaint a Surfboard with Ashley Johnston Rhea Cortado

The sun-tinted, dented and dinged up longboard Ashley found at a garage sale had seen better days, but with a little bit of love, it still had a few more rides left in it. Ashley showed us how she repainted it to make it her own.

More

]]>
Ashley repaints a longboard she found at a board swap. 


Fellow garage sale, flea market and thrift store addicts — our homes are filled with vintage castaway furniture, quirky knick knacks and retro threads, with stories behind where and how we discovered each piece.

One of our Seeababes, Ashley Johnston is no exception. Her latest find was an old longboard that she picked up at a board swap. She actually had her eye on a different board, but was swooped in by an old uncle! The owner didn't want to disappoint her and pulled out a second board and sold it to her for even less. The sun-tinted, dented and dinged up longboard had seen better days but with a little bit of love, it still had a few more rides left in it. Ashley showed us how she repainted it to make it her own.

Watch the short video below, and keep going for the full DIY instructions!


Gather what you'll need. 

Gather up all your materials: 

  • Mineral spirits to help clean the board off
  • Sand paper: you want to use a light or fine grade paper to detail everything. You don't want to be too harsh. 
  • Wax comb to scrape off the old wax
  • Pencil to mark where you want to paint the stripes
  • Painters tape to mark off the striped zones
  • Old fabric to protect your work space from unwanted paint and the parts of the board you aren't painting on
  • Newspaper also to protect your work space from unwanted paint and the parts of the board you aren't painting on
  • Spray paint colors. We used the matte as a personal preference. Don't forget the clear coat after the color to make sure the paint stays on better. 
Step 1: Get into some work clothes and clean off the board with the sandpaper. Here's the time to repair any dings with Sun Cure too. 
Ashley cleans off the board. 
Clean off the old wax. 

Step 2: First color! For stripes or color blocking, tape off the portion of the board that you want to paint first. We started with the blue, the biggest portion of the board. Get spraying. 

Ashley tapes off a section to paint. 
Spray painting the first coat. 
 Keep going! 

Step 3: Let it dry. Hang out. 

Watching paint dry. 
Hooray! Paint is dry! 

Step 4: Hooray! Paint is dry. Tape and cover up the part you just finished (in our case, the blue) so you can paint the rest of the board without getting any stray paint on it. Spray paint the second color. We did the green nose next.

Finishing up the nose in green. 

Step 5: DIY is more fun with friends. To create the stripes on the tail, tape off the parts that you want to remain the base color (the blue). The part that is exposed will be spray painted with another color. We did yellow. 

Taping off some stripes with the help of a friend.
Tape off the top of the board too to protect from spray paint particles. 

Step 6: Spray paint the stripes. Let them dry. If there are some bumps or rough spots, you can sandpaper them smoother. Apply the clear coat over the whole board at the end. 

Spray painting the stripes 

Step 7: You're done! Add a fin, wax it up and take it out for a glide.

The finished stripes. 
Add a fin. 
Ashley on her newly painted board, wearing the Riviera in Sea Glass. Photo by Alex Swanson. 
Glides like new! Photo by Alex Swanson. Ashley wears the Riviera in Sea Glass. 
Ashley in the Palmas. Photo by Marcus Bloss. 
Surfboard tails can be a clean surface to dry your suits for a day at the beach! 

More DIY:

]]>
https://www.conciliacionconstrupaz.com/blogs/seeababes/diy-surfboard-bags-with-green-fuz 2013-07-03T13:20:00-07:00 2023-12-20T10:52:57-08:00 DIY Surfboard Bags with Green Fuz Rhea
Why put your special hand-shaped surfboard in an ordinary bag for everyday protection? Green Fuz’s handmade surfboard bags put a smile on our faces every time we carry one under our arm.

From the dyed fabrics to selection of patterns, you can see the extra time that goes into each bag. Each one is cut, sewn and shipped just a stone's throw away from Seea headquarters in Ulvila by friends...

More

]]>

Why put your special hand-shaped surfboard in an ordinary bag for everyday protection? Green Fuz’s handmade surfboard bags put a smile on our faces every time we carry one under our arm.

From the dyed fabrics to selection of patterns, you can see the extra time that goes into each bag. Each one is cut, sewn and shipped just a stone's throw away from Seea headquarters in Ulvila by friends Sonny Nigro, Cassandra Jerrold-Jones and Scott Reynolds. We cruised on over to watch one of their special creations come to life from start to finish.


Color coordinate your quiver with Green Fuz surfboard bags. 

Green Fuz had a slow start, but didn’t give up. Its first ever bag was made out of terrycloth and after a 6 laborious hours, “it still didn’t come out good.” The idea was put on the backburner for a while until Sonny came across an industrial sewing machine. During Christmas break, they gave it another shot and made some cool bags for themselves, with Cassandra handling the sewing needle. The second time was a charm.

“We had some time off work and were still into the idea of making bags, so we drove around to all these different places and got some cool fabric and just went for it,” says Sonny. “We were just like, screw it…don’t over think it and let’s make some cool bags for ourselves. And they actually turned out really cool thanks to Cassie being able to sew really good.”


DIY projects love patches.


The rest fell into place. “We made like 5 bags and put them on Instagram. The post wasn’t really meant to sell anything—just show what we made and if anybody wanted to hit us up to make them a bag. But then literally, that night, a local shop hit us up to see how they could order some from us, and that was it. Green Fuz was on!” says Sonny.

Each friend plays a role in getting the final product completed. Sonny designs bag colorways and patterns, Cassandra sews the bags and Scott is in charge of the website, customer service and sales.

Green Fuz walked us through step-by-step all the care and hands-on work that goes into making their handmade surfboard bags. It re-inspired us that if you have a great idea to make something with your own style, to go for it!

Sonny and Scott dig through the stacks
Make ordinary fabric extraordinary by dying. 


Materials. "Everything is made to order, but we have stock fabrics and like 15 different designs to choose from," Sonny says. Green Fuz dyes some of its fabric for an extra touch of personalization.

Made to measure.


Design. “Anything can be modified by request, but the basic pricing and shapes are all up on our website, Green-Fuz.com” Sonny says.

“We try and form some sort of relationship with the shops and people that order from us. They get stoked that we respond back so quickly, and it’s been fun to talk to people about their different boards, get the measurements, and make up something custom for them. Seems to be working since people keep re-ordering.”

Sewing with friends.
Pins keep the two pieces of fabric in place. 

Production. “Cassie sews everything, she’s pretty much production. I take care of the designing the bag color-ways and layouts," Sonny says.

"And Scott handles the website, customer service and sales. Production, design, and technical. It’s a perfect combination. If it was just Scott and I, we wouldn’t have any bags because Cassie’s got the sewing machines dialed. If it was just Scott and Cassie, then the colors and designs might not be as appealing, and if Green Fuz was just me and Cass, we’d have a bunch of bags, with no website, and no one to sell them to. It’s a definitely a group effort and we all do our part to make it happen.”

Vintage industrial sewing machine doesn't mess around.
To finish the seams so that they don't fray (that zig-zag stitch you see inside just about all of your clothes) requires another type of sewing machine. 


More Production. Cassie adds that they have it down to about one hour per bag from start to finish. “We still hand cut, sew, and dye different fabrics, which can be pretty time consuming. Every once in a while we’ll screw something up, sew a panel backwards or something, but we’re getting better with each bag and refining the production process with each batch. That’s just the nature of handmade goods – A lot of love goes into each bag, which people really appreciate.”

Custom patches. 

Where the name Green Fuz came from. “Well, if we would’ve known this was going to go anywhere, we probably would have thought about it a little more!” Sonny laughs. “Green Fuz is an old band and song from the 60’s. We’re all really into music and Scott and I grew up listening to The Cramps (who covered the song) so we just kinda went with it. Plus, I like the look of it with just the one “Z”. Great song too! Look it up.”


We did the Googling for you. Listen to it on YouTube.
Final touches on the bottom drawstring. 
Details make a difference. Close-up of the drawstring and toggle closure.


What's Next for Green Fuz. “We want to do travel bags and other accessories as well. We have some really cool ideas for leashes and traction pads that would be really fun to make.  In the end, we’re not really doing anything new. We’re not trying to reinvent the wheel… We just wanna spin it! What is new is how we’re doing business with people and shops, our attitude, and the satisfaction that comes from doing cool stuff with and for cool people. It’s a whole different perspective on business that the shops are really open to right now, and it’s a great feeling to see our stuff in stores next to other companies that we really like. Basically it’s like this… 'Don’t over think things. Do business with your friends… and become friends with the people you do business with.'" 


We couldn't agree more.

All done. 
The Green Fuz team! 
]]>
https://www.conciliacionconstrupaz.com/blogs/seeababes/well-leave-the-light-on-for-you 2012-06-22T08:41:00-07:00 2023-12-14T10:16:49-08:00 "We'll leave the light on for you" Seea As our fans & blog followers might recall, Darren from Black Duck Ding Repair helped us out a few months ago to create a special Seea x Surf Indian lamp. Lots has happened since then, including installing their custom display, but somehow wrapping up the lamp project got swept pretty far under the rug! Well, the special colored gels arrived the mail this week, so we figured it was high time to...

More

]]>
As our fans & blog followers might recall, Darren from Black Duck Ding Repair helped us out a few months ago to create a special Seea x Surf Indian lamp. Lots has happened since then, including installing their custom display, but somehow wrapping up the lamp project got swept pretty far under the rug! Well, the special colored gels arrived the mail this week, so we figured it was high time to finish this project once and for all!

Pretty simple concept: Cut the colored "gels" to fit the lamp panels, tack em' down & light it up!
The fiberglass panels were cut to fit, and slid easily into place.
The final product got lots of likes on Instagram. We like it, too!!
]]>
https://www.conciliacionconstrupaz.com/blogs/seeababes/building-nothing-out-of-something 2012-06-08T00:18:00-07:00 2023-12-18T15:26:17-08:00 Building Nothing out of Something Seea

An...

More

]]>
It's only fitting to build a visually appealing display for Seea's striking swimwear, but that doesn't mean it's quick and easy. We could go out and find something pre-assembled, "made in China" that's ready to go, but we prefer to get our hands dirty, break out the sander, and do it ourselves! This custom display for Seaworthy in Carlsbad, CA started out rough, but was well worth the work!!

An section of oak flooring (left) and nicely weathered fence door (right), salvaged from an old house in Orange, CA
After a thorough sanding, boards were cut to measure against a simple redwood frame
The colors really came together on this one - dowels & bronze flanges complete the look
Dayton and Surfy Summer check out the finished display

Thanks again to Dayton, Elise, and the crew at Seaworthy for the prime window seat! Another great example of independent folk, working together to keep up the stoke!

]]>
https://www.conciliacionconstrupaz.com/blogs/seeababes/d-i-y-p-o-p 2012-03-21T08:50:00-07:00 2023-12-20T10:40:17-08:00 D.I.Y. / P.O.P. Seea In the retail world, POP stands for "Point of Purchase". It's a broad, catchy term used to describe all the things companies use to display their product in a retail environment. At Seea, our budget is pretty small for such things, which just means we have to get creative and go DIY!


Our friend Darren at Black Duck Ding Repairis a pretty busy guy, but he sure stepped up to the plate when we...

More

]]>
In the retail world, POP stands for "Point of Purchase". It's a broad, catchy term used to describe all the things companies use to display their product in a retail environment. At Seea, our budget is pretty small for such things, which just means we have to get creative and go DIY!


Our friend Darren at Black Duck Ding Repair is a pretty busy guy, but he sure stepped up to the plate when we presented him our latest project. The challenge: convert a thrift store lamp into an amazing piece of custom POP, built for our friends at Surf Indian. Check out the photos - he did a "bang up" job!


Initial planning with the Surf Indian & Seea logos printed out on rice paper
Darren lays down a "logo sandwich" - the rice paper disappears as the resin soaks through the fiberglass
After the resin cured, we cut out the "window panes" to fit the lamp. They slid right into place!


Darren, amazed at the final product! 


Well, it doesn't get much better than that for custom POP. Just goes to show that it sure helps having a good ding repair guy - thanks Darren! Be on the lookout for more special projects from Seea x Surf Indian soon!!]]>